- 02/02/2017
- 3 Min Read
- By: Alex Fiehl
Replacing Drive Belts, Tensioners, Pulley On BMW E39 Six-cylinder Engines (525i, 528i, 530i)

The drive belts on the BMW e39 engines are regular maintenance items, but the pulleys and tensioners need careful attention once a car passes 100,000 miles. The job is not particularly difficult if done it at the same time as a cooling system service, like a water pump or thermostat.
Whenever you remove the drive belt, take a few seconds to spin all of the pulleys, especially the pulleys on the tensioners and the one idler pulley on the driver’s side of the engine. If the bearings are anything but smooth, have any amount of wobble, or sound at all crunchy in their operation… It’s time to replace them.
Parts:
- A/C Tensioner —11281433571
- A/C Drive Belt —11281437450
- Accessory Tensioner — 11281427252
- Accessory Idler Pulley — 11287841228
- Accessory Drive Belt — 11287636379
- Optional: Water Pump Pulley – 11511436590
Tools:
- Socket wrench
- 13mm socket
- 16mm socket
- Small flat-blade screwdriver
- Torque Wrench – foot pounds
- Torque wrench – inch pounds (optional)
- Jack stands (optional)
- Floor jack (optional)
Some Special Notes:
Step 1: This procedure is very similar on the E46 cars, however the process for removing the fan shroud and cooling fan will differ.
Step 2:Before ordering parts, check the accessory belt idler pulley. There are two types available: some have the mounting bolt centered, others have the mounting bolt offset. This DIY will cover the latter.

Step 3:Before ordering parts, look at the accessory belt tensioners. Some e39 cars had swing-arm tensioners. And others had tensioners that look like little shock absorbers. This DIY will cover the swing-arm type.
Step 4:You can prep for this job by watching this video below of the procedure:
Removing the Fan Shroud
Raise the front end of the car, and support it on jack stands
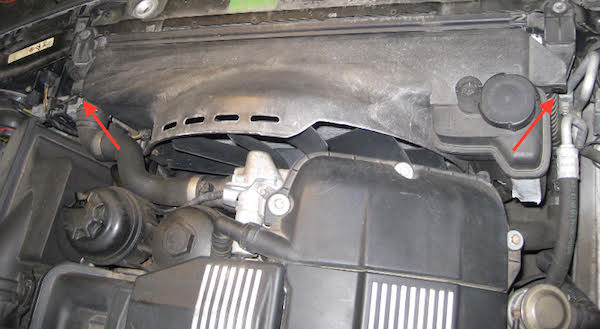
Use a small flat-blade screwdriver to pop out the retainers that attach the fan shroud to the radiator.
Disconnect the wire from the auxiliary coolant pump (located on the lower, rearward driver’s side of the radiator fan shroud). Slide the pump out of its mount. Remove the coolant hoses from their clips.
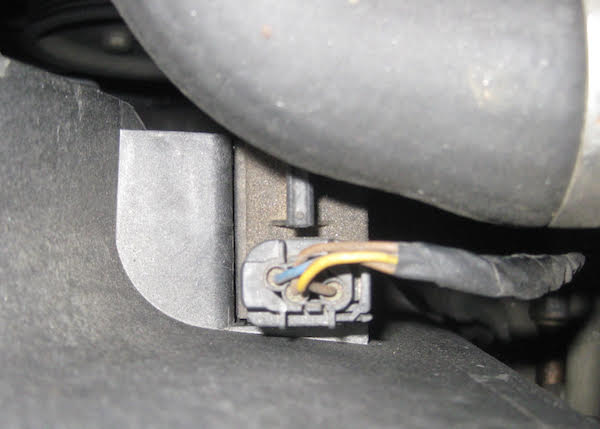
Disconnect this wire on the driver side of the fan shroud.
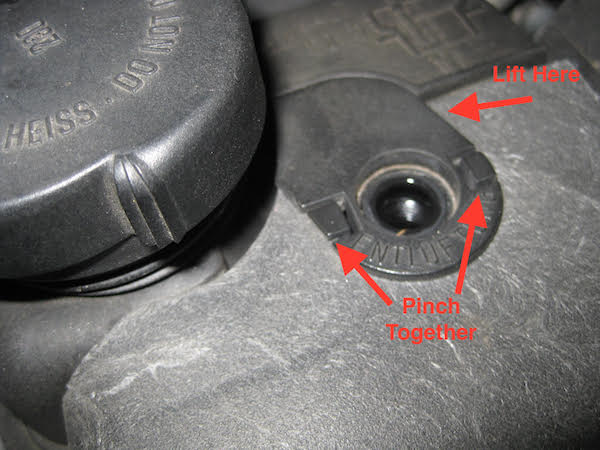
Remove the plastic tab (a.k.a. the tank seal) that seats around the bleeder. Squeeze the two tabs on either side, and use a flat blade screwdriver to pry the rear portion of the tap upward. Remove the tab.
Release the expansion tank from the fan shroud by lifting it slightly, and move it out of the way.
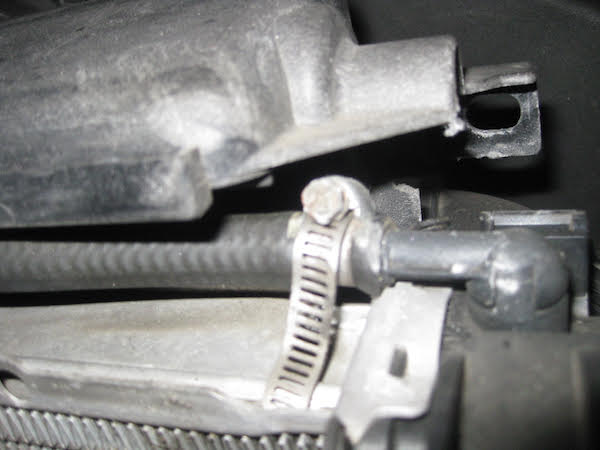
Lift the fan shroud about 1 inch and disconnect the small vent hose at the top driver side of the radiator.
Use a fan clutch tool and thin 32mm wrench to loosen the fan from the water pump.
Once the fan bolt is loose, you can spin the fan clockwise, by hand, off of the water pump.
Lift the fan and the fan shroud out of the car at the same time. Do this slowly and make sure that all of your connectors are out of the way and that the shroud is not hung on any hoses.
Removing the Drive Belts
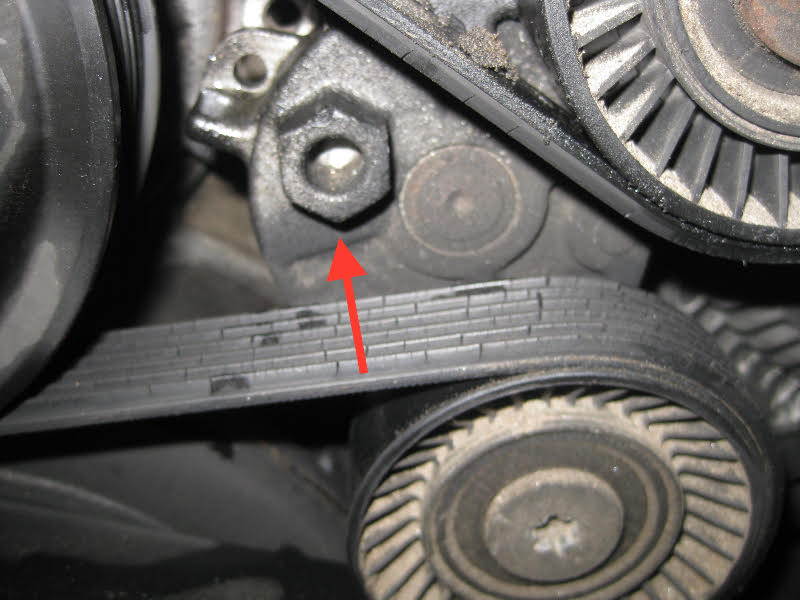
Use a 16mm socket to turn the accessory belt tensioner enough to loosen and remove the belt.
Use a 16mm wrench or socket to turn the A/C belt tensioner enough to loosen and remove the belt.
Replacing Pulleys and Tensioners
Use a 13mm socket to remove the two bolts that hold the accessory belt tensioner in place.
Install a new accessory belt tensioner. Torque the bolts to 14 foot-pounds.
Use a 16mm socket to remove the idler puller bolt.
Install a new idler pulley. Torque the bolt to 30 foot-pounds.
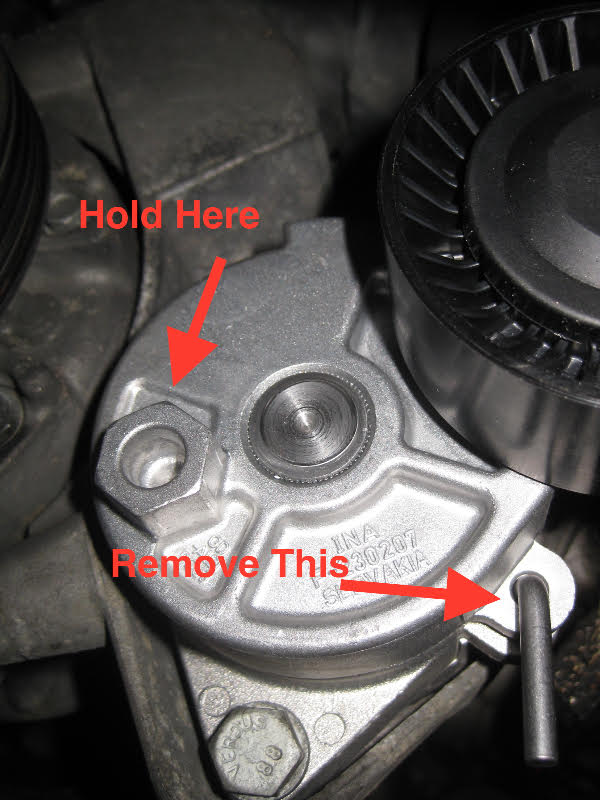
Use a 16 mm socket or wrench to turn the A/C belt tensioner until the two holes on its side are aligned. Insert a nail or thin screwdriver into the holes to lock the tensioner in place. This will allow access to both bolts.
Use a 13mm socket to remove the two bolts holding the A/C belt tensioner in place.
Install the new tensioner. Torque bolts to 14 foot-pounds.
The new tensioner will likely have a retainer pin installed. DO NOT simply pull the pin out. Use a socket to hold back the tension in the tensioner, remove the pin, and slowly let the tension swing back into position. (NOTE: You can save this step for later once the drive belt has been installed.)
Optional: If your car’s composite water pump pulley has not recently been replaced, this is a great time to do it: Remove the four 10mm bolts, remove the pulley (you may need to place a piece of wood against it and lightly tap with a hammer), replace with a new pulley, and tighten the bolts to 89 inch pounds.
Replacing Drive Belts
Install the accessory belt first. Use a 16mm wrench to swing the tensioners in a direction that creates enough slack to install the belt.
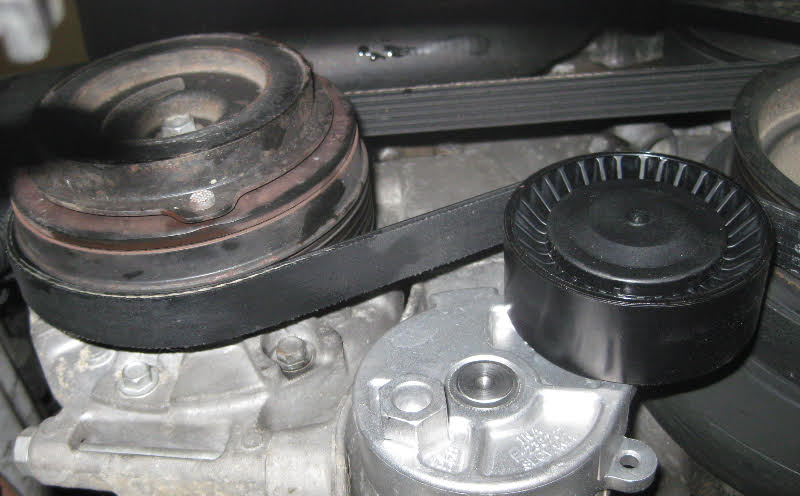
Install the A/C belt. Use a 16mm wrench to swing the tensioners in a direction that creates enough slack to install the belt.
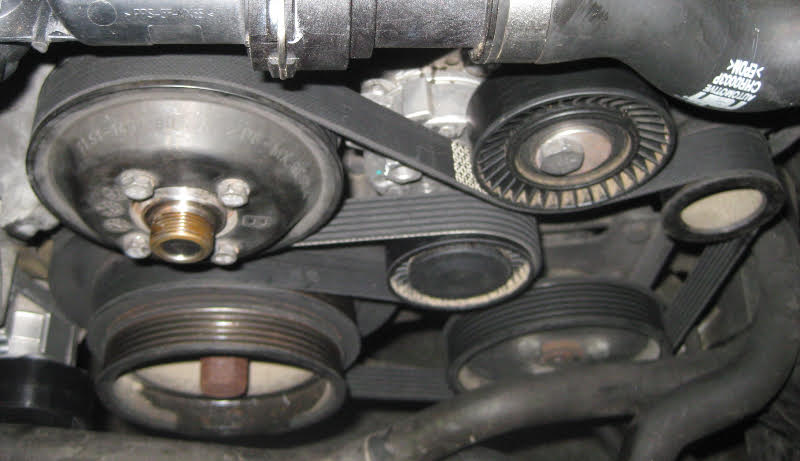
General rule to remember: The pulleys either have ridges or flat surfaces to mate with the sides of the belt. If you see ridges touching flat surfaces, start over.
Putting it Back Together
Recheck that the drive belts are properly seated in the pulley grooves.
Install the fan and fan shroud together. Spin the fan back onto the water pump (counterclockwise).
Reinstall the coolant expansion tank on the fan shroud.
Route the coolant expansion tank’s vent hose back to vent tube on the driver’s side of the radiator.
Reattach the electrical plug on the driver’s side of the radiator.
Reinstall the retainers that hold the fan shroud to the radiator.
Reinstall the auxiliary coolant pump and hoses to the fan shroud. Reattach the electrical plug to the pump.
Remove the jack stands and lower the car to the ground.
Go for a test drive!


