- 02/03/2017
- 2 Min Read
- By: Gareth Foley
How to Replace Rear Trailing Arm Supports on an E34 5-Series (BMW)

Time: 1 hour
Difficulty: 2 out of 5
The car’s trailing arms (a.k.a. rear control arms) are basically the meeting points for the rear wheels and all critical suspension components. The trailing arm uses a series of bushings to connect it to the vehicle’s subframe. When a bushing wears out, it can cause the car’s handling to become pretty bad.
In E34 cars, this can produce a symptom commonly known as "wandering butt syndrome”. That is when the car's rear end doesn't feel like it is tracking properly in turns. This symptom is commonly caused by broken of failed trailing arm supports (a.k.a. the dog bones, a.k.a. pitman arm, a.k.a. trailing arm connector links). These are the little dumbbell-shaped links that help keep the rear end in alignment during hard turns and bumps.
Diagnosis:
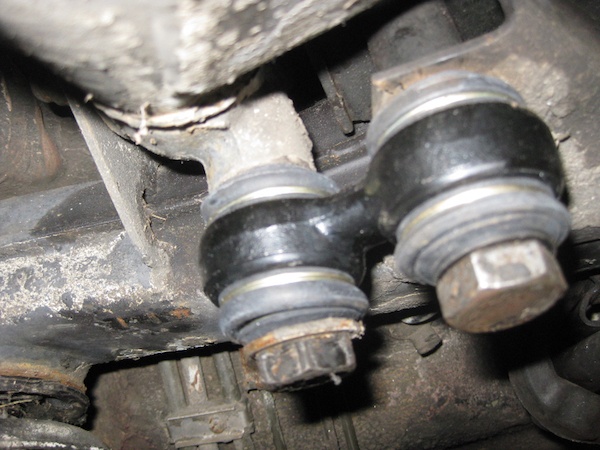
Fortunately, this is a relatively straightforward repair. The trailing arm supports are easily visible without removing the wheels. They can be seen on the forward side of the trailing arm, almost in front of the tires.
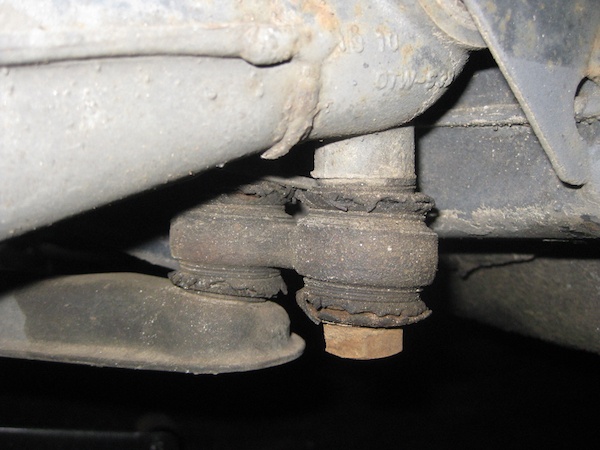
In my car’s case this case, it was easy to determine that the trailing arm support had failed. The car was making a clunking sound over bumps, its rear end did not track properly in turns, and the bushings in the connector links are visibly deteriorated.
Compared to many suspension components on a BMW, these parts are relatively cheap and easy to replace. They are a great first project for anyone who does not have a lot of experience working on their car's suspension.
Notes about parts:
- Even if only one trailing arm support is worn out, it is best to replace them on both sides of the car to ensure even handling.
- Be careful when ordering these parts. They look rather similar (online, not in real life) to the car’s stabilizer bar end links. And some less knowledgeable parts sources list these parts almost interchangeably. Know what you are buying.
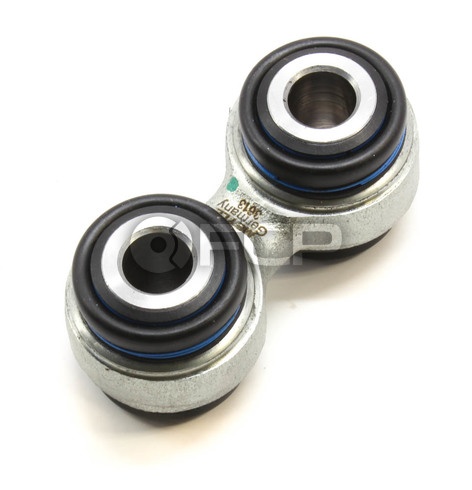
BMW Trailing Arm Support Rear (Pitman Arm) - Meyle 33321125665
BMW Trailing Arm Support Rear (Pitman Arm) - Lemforder 33321125665

Tools:
- Jackstands (tire chock if needed)
- Floor Jack
- Torque wrench
- 22mm Socket (equivalent to 7/8-inch socket)
- Breaker bar (or pipe extension on a wrench)
- 22 mm open wrench (equivalent to 7/8-inch open wrench)
- Penetrating fluid
Preparation:
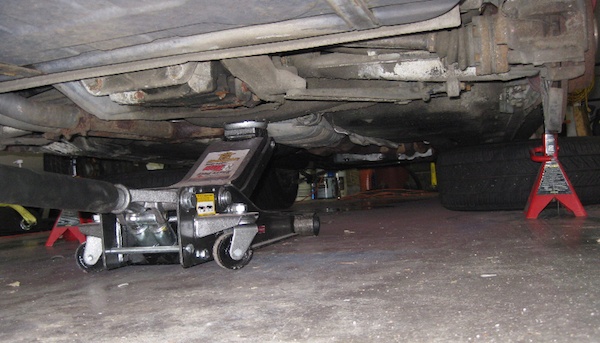
Unlike some other brake jobs or suspension jobs, it is best not to lift only one side of the car at a time. This will put unbalanced weight on the subframe and may make it difficult to align the new parts in their place. If you can, jack up the front and the rear of the car to make it sit level. Or chock the front tires and place the rear of the car on jackstands , using the jack points on the body (under the rear doors). Next, remove both rear tires and place them under the subframe of the car for added safety. In this example I am leaving my floor jack under the car for added stability. Note that there is no need to go under the car to perform this repair.
Since the trailing arm supports are so close to the tires, they bear the brunt of all road grime that your car encounters. Expect the bolts to be very crusty. Spray them with penetrating fluid and allow some time to soak. In extreme cases, you may need to scrub the bolts with a wire brush to remove road grime.
Procedure:
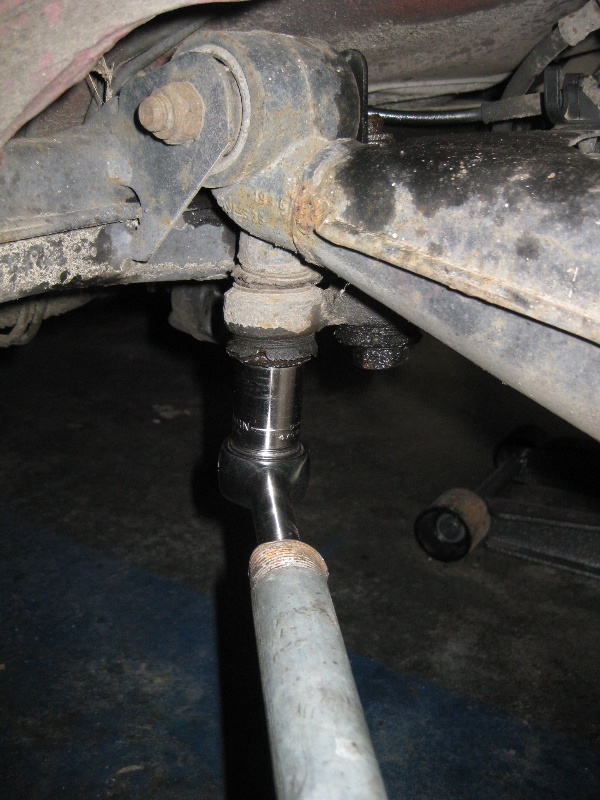
- With the car safely supported on jacks, use a 22 mm socket attached to a breaker bar (or a normal socket wrench with a pipe extension) to loosen the outboard bolt. Do not remove it completely yet, because this bolt will prevent the trailing arm support from moving as the next bolt is loosened.
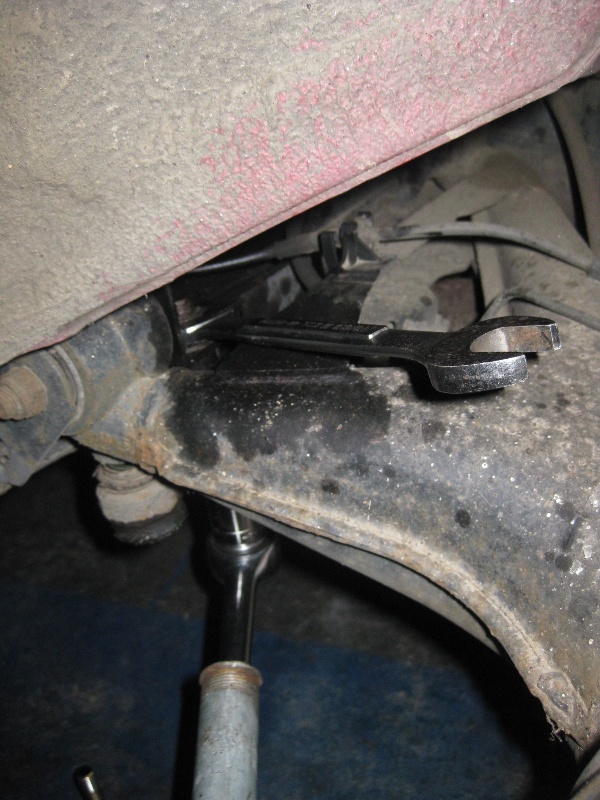
- For the inboard bolt: place a 22mm open wrench on the top nut. Turn the bolt from underneath using a 22mm socket attached to a breaker bar.
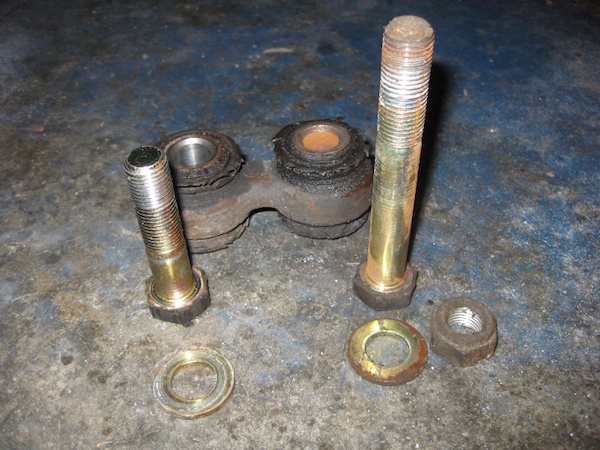
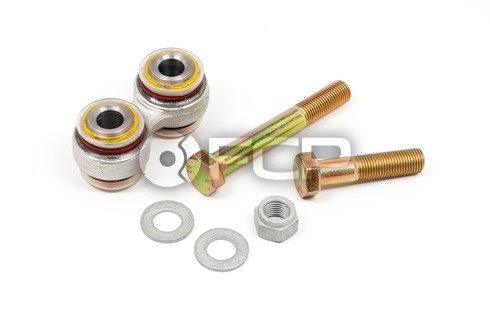
- Undo both bolts and note the differing lengths and placement of washers for each.
- Remove the trailing arm support.
- Install new trailing arm support, and install bolts snug.
- Repeat this process for the other side of the car.
- Reinstall the wheels, and lower the car to the ground to put full load on the suspension.
- Torque the bolts to 94 ft/lbs, per Bentley Manual specs.
- Take the car for a test drive
While You are Down There:
- Inspect brake pad thickness
- Inspect condition of stabilizer bar end links
- Inspect condition of other trailing arm bushings
- Replace fuel filter (if needed)
- Inspect self-leveling suspension components for leaks