- 01/31/2017
- 1 Min Read
- By: Gerry Tseng
How to Repair a Loose Headlight Switch on a Saab 9-3

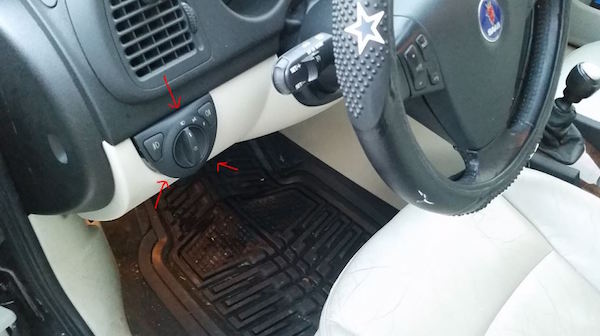
During a morning drive I noticed that the Saab’s headlight switch was dangling from the dashboard like if it was hinged at the top as it swung back and forth at the bottom.

I carefully pulled it out and I noticed that the 3 metal tabs which were supposed to hold it in place were loose on the switch’s plastic housing. Looking at it carefully it appeared that the plastic housing’s slots where the tabs slipped into were mostly cracked and broken. The switch itself still worked but the tabs holding it in place didn’t as they weren’t secure.
I felt this was worth a shot at repairing: if it didn’t work then I’d just go order a new switch.
Tools you’ll need:
- Small flathead screwdriver
- Tiny, shallow screws (I happened to have a few from previous electronics projects)
- A small drill bit (sized appropriately for aforementioned tiny screws)
- A new headlight switch (if needed)
- Less than an hour of free time
Ready to remove (and potentially repair) your headlight switch?
As mentioned above, the headlight switch is held in place by tension from 3 metal tabs. It’s pretty easy to remove.
Step 1
If your switch isn’t already dangling like mine was, start by prying out the switch from the bottom tabs using a small flathead screwdriver. Be gentle and take your time so that you don’t break anything: I figure the plastics on these 2004 Saab 9-3 cars are all brittle at this point..
Step 2
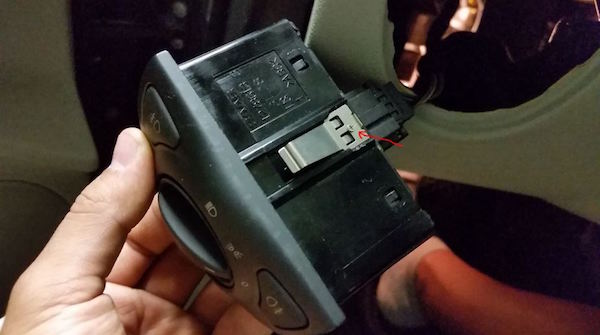
Once removed from the dash, disconnect the wiring harness behind it.
Step 3
At this point you can choose to simply replace the switch with a new one if you were already planning on that. Installation is the reverse of removal. Or if you were in my shoes, consider repairing the tabs and continue below if you’ve got tiny shallow screws to work with.
Step 4
Unfortunately I didn’t have pictures of extra screws on-hand as the ones I used were already part of the completed repair but I’ll describe what I did:
- Not knowing what clearance I had to work with inside the plastic housing, I used small electronic screws that were about ¼” deep. I figured this may be sufficient, else worst case I’d be buying a new switch anyway.You’ll see the screws in relation to the metal tabs in the pictures below to get a sense for how tiny these were. I suspect screw depth is more important than screw diameter so pick something that could work for the tabs while still being flush enough to reinstall the switch back into the dashboard.
- I drilled pilot holes in the metal tabs only. I picked a centered spot where it should be attached to the plastic housing and drilled a hole big enough for the screw to enter but small enough that the screw head could anchor against it.
- Setting the metal tab in place where it should be, I used a jeweler’s screwdriver and took my time to get the tiny screw to bite into the plastic housing and eventually tap itself in. I only tightened it enough such that the tabs felt secure without stripping the new screw holes.
- I repeated this for the other 2 metal tabs.
Step 5
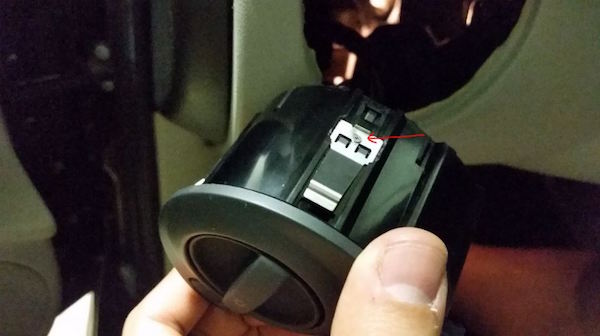
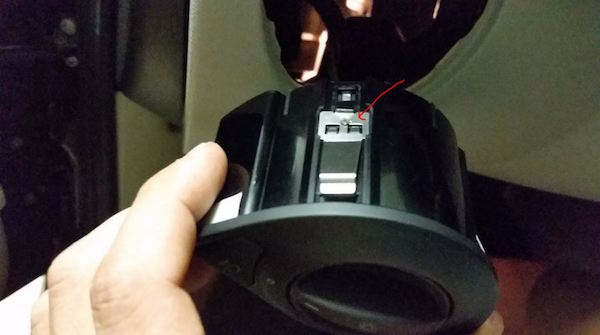
Here are pictures of each of the metal tabs. If you look carefully you can see the broken plastic slots on the switch’s housing which was supposed to hold the tabs. The screws are now doing that job.
Top screw:
Lower-left screw:
Lower-right screw:
Step 6
Ensure that the wiring harness is plugged back in, turn on the car and check that the switch works.
Step 7
Carefully push the switch back into the dashboard and you’re done!
I got lucky and this physical repair worked. Sadly, I wasn’t impressed with aged plastic becoming brittle and almost rendering a perfectly working switch getting tossed into the trash. I suspect an alternative way to do this physical repair could be to use a few revolutions of electrical tape around all 3 broken tabs but I don’t know how solid of a hold it would be. I would have tried that if I didn’t have screws!