- 12/16/2014
- 1 Min Read
- By: William Yelder
How to Install an Engine Mount on a BMW 3-Series (E30)

The BMW 3-Series is one of the most iconic vehicles BMW ever built. It has always been synonymous with the motorsports division of BMW since the day of the E30 M3. Recently I had the opportunity to do a little wrench time on a friend's 1987 BMW 325i. He had retired the car early this year from its autocross duties to give attention to some necessary maintenance issues which he incurred during his last event.
A rumbling noise while at idle
Since this was his first year entering into the local autocross events, his car was relatively bone stock except for a lightened interior, some suspension and brake upgrades, a Remus exhaust, and roll cage which he hadn't installed yet. One of the issues that arose was an engine shake, and a rumble/rattle noise while at idle and when driving. Usually these symptoms can be various things, but in his case it was associated to the motor mounts. Over time they tend to become worn and can separate and snap the mounting bolt. In my buddy's case, they had split and as a result the engine twisted slightly. This affected the transmission mounts as well causing his day at the event to become short-lived. However, he had already replaced the transmission mounts prior to my enlistment to help. All that was left for us to do was to replace the old worn bushing with new ones.
The Job
It's a pretty straightforward maintenance repair and can be performed in a driveway or garage. After placing the car in gear, lift the parking brake, and disconnect the battery. Open the bonnet and remove the nut from the top of the motor mount. This was pretty easy for they can both be accessed in the engine compartment without lifting the car.
Place the car on jack stands, then chock the rear wheels. Remove the nuts located on the bottom of the motor mounts. Using a floor jack and a 2x4 we carefully lifted the engine up by the oil pan just enough to be able to pull the mounts out of their homes. You have be careful of items getting snagged so watch and stop if necessary to move things out the way.
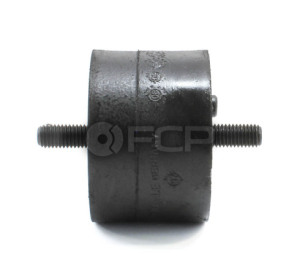
Once up, you can remove the mounts. If the mounts have separated into two pieces and are stuck on the car/engine, you may need to go another step to completely remove them. For us a screw driver and a little caveman engineering (we used a hammer to knock it loose) were choice items to free the mounts.
Being that my friend actually uses his 3-Series as his designated autocross vehicle he installed new polyurethane motor mounts as an upgrade replacement. The factory motor mount bushings would do the job effectively. However, he wanted something a little more firm. New mounts in hand we placed them in and tightened the bolt from the bottom. Carefully we lined up the engine to drop it onto the new mounts. Once the engine was down, we tightened the nut back onto the top of the mount.
Installing motor mounts is more intimidating than it is difficult. Though we knew what to do, we had a repair manual at arm's reach to verify tightening torques, something every DIY mechanic should make a point to keep available during a similar project.