- 02/02/2017
- 3 Min Read
- By: Nicolas Siemsen
How to Change Coolant in a Diesel W123 Mercedes-Benz

It often seems that coolant is one of those out-of-sight, out-of-mind maintenance items even for most DIY mechanics. Especially with modern coolants that have extended lifespans of 5 years or 100,000 miles, it can feel like an item that needs little or no attention.
However, neglected cooling systems are one of the most common trouble areas on older vehicles, ones that have possibly gone 7, 8, even 10 years without a coolant change. The damage that is done inside an engine's cooling system when this is allowed to happen needs to be seen to be believed.
The Mercedes-Benz OM61X family of diesel engines, despite their reputation for being indestructible, are no exception to this. With that, it is important to know the process for draining and refilling the coolant on your Mercedes diesel. Note that this coolant change process will be similar on most any car of this era, and also many newer cars - you'll just have to locate the radiator and/or block drain plug, and the coolant fill location, on your own car.
When it comes to selecting the proper coolant, a good start will be to read "The Importance of Selecting the Proper Coolant for your European Car. If in doubt, go with the coolant provided by your car's manufacturer. You are in luck as FCP Euro carries coolant for several European makes:
To being with, lets have a safety discussion - never, ever work on your cooling system while the engine is hot! Your cooling system is designed to work under pressure, which raises the fluid boiling point. This means that if you remove the radiator or expansion tank cap when the system is hot you may be showered with scalding hot coolant. This can lead to some serious injury!
You will need:
- Two gallons of the correct type of coolant concentrate and two gallons of distilled water (you will use 1.5 gallons plus 1.5 gallons of distilled water – pre-mix the other 0.5 gallon of coolant with 0.5 gallon of distilled water and keep it in your garage for top-offs as needed).
- One radiator drain plug – while not required, it is a good idea to replace this each time you renew the coolant in your car as it is made of soft plastic and could easily break off during a future coolant change if it gets old and brittle or has been over-tightened.
Step 1
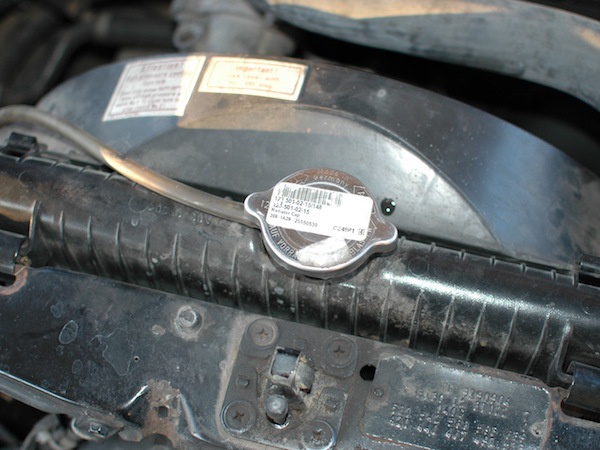
Begin by removing the cap on either the radiator or expansion tank, depending on the era of W123 that you have. Early models without turbochargers were not equipped with expansion tanks. Removing the cap will help speed up the draining process.
Non-turbo radiator cap:
Turbo-diesel expansion tank:

Step 2
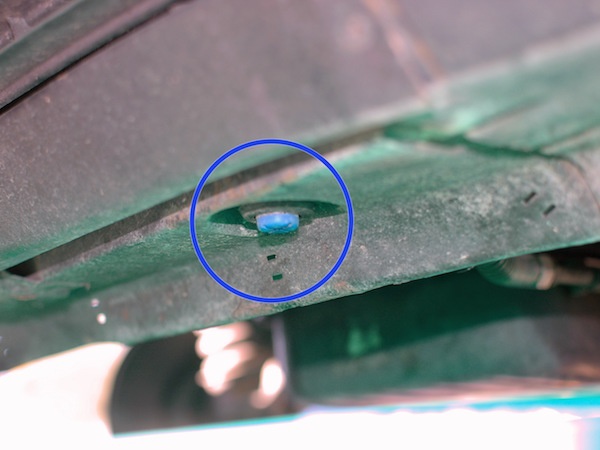
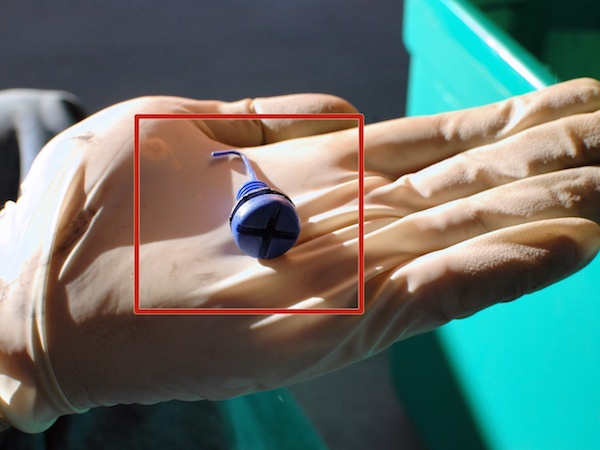
Just under and behind the front bumper you will see the radiator drain. This plug may be black, if it is an old plug. Newer replacement plugs are blue. A large flat head screwdriver is a good tool to use to remove this plug. Note that the plug will most likely have a hook on it, especially if it is a new replacement style blue plug. This hook is designed to keep the plug from falling in to your drain pan.
Drain plug location on the bottom of the radiator:
Drain plug with hook:
Step 3
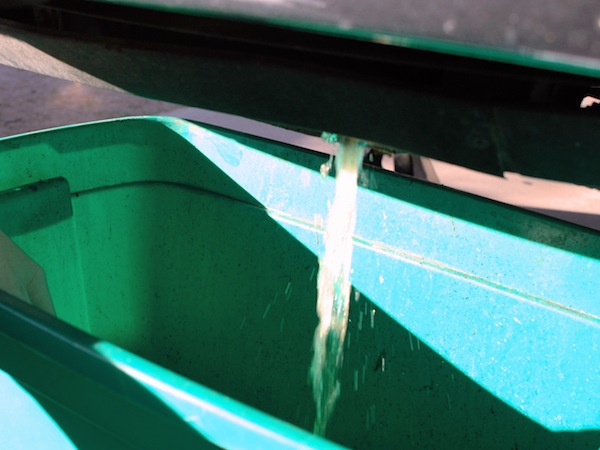
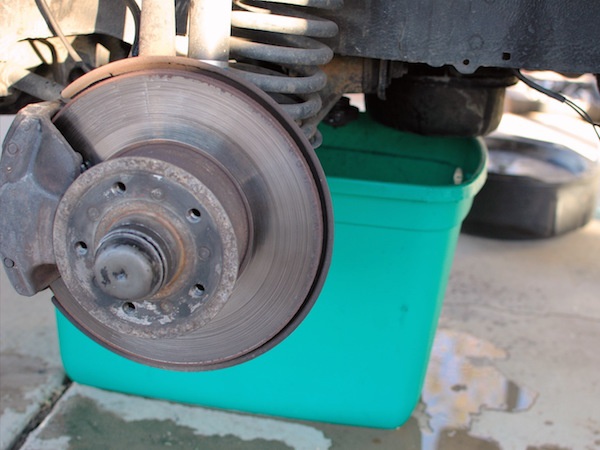
Once you have removed the drain plug, let the radiator drain until it is just dripping slowly. A high-sided tub works great for this process - the coolant will come out quickly and would splash out of a regular drain pan.
Now that your radiator is empty, you can proceed to drain the engine block. It is important to complete these next steps as the radiator only holds about a gallon of fluid, while the system holds a total of three gallons. The rest is in your engine block.
Step 4
Move your drain pan back underneath the engine block, near the exhaust pipe on the right side/passenger side. The general location is shown in this picture, with the front of the car on the right:
Step 5
Start this step by locating the block drain plug. It is in the same location on both the early non-turbo and the later turbo-diesel W123's. However, seeing it and getting a socket wrench on it is more difficult on the turbo-diesel cars as the turbo and exhaust manifold take up much more space and as such are harder to work around. The pictures that follow were taken on a non-turbo diesel car.
The block drain plug is located on the right side/passenger side of the engine block underneath the intake/exhaust manifold. The general location is shown, when looking from above, in this picture:
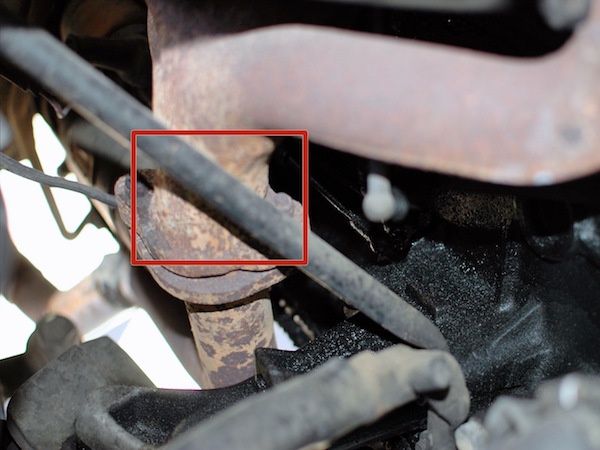
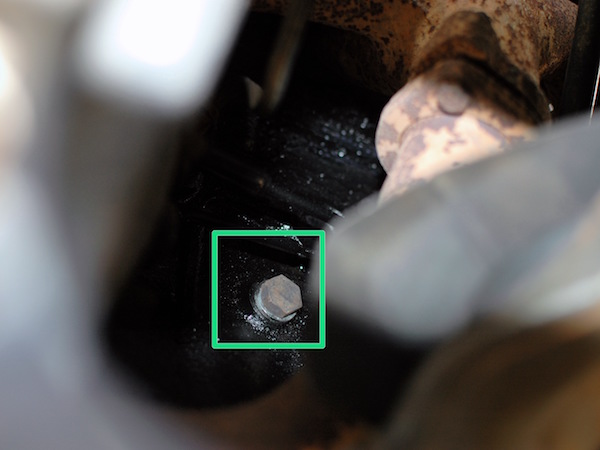
Here is a picture of the block drain plug looking up from below, past the tie-rods and other suspension/steering parts:
Once you've located the drain you can work on removing it. This is easier said then done. It is a bit of a contortion act. Take your time, using a 19mm socket with one or more universal joints and/or extensions as you see fit. On non-turbo cars you can remove the plug while standing above the engine, locating it and placing the socket on it by feel. This can keep you from getting a coolant shower! When draining the block the coolant tends to come out quickly and hit the motor mount, splashing pretty badly! On turbo cars you will likely find that you need to remove the plug from underneath so a bit of a coolant bath may be unavoidable. Sorry to be the bearer of bad news! Just keep your pan nearby and move as quickly as you can.
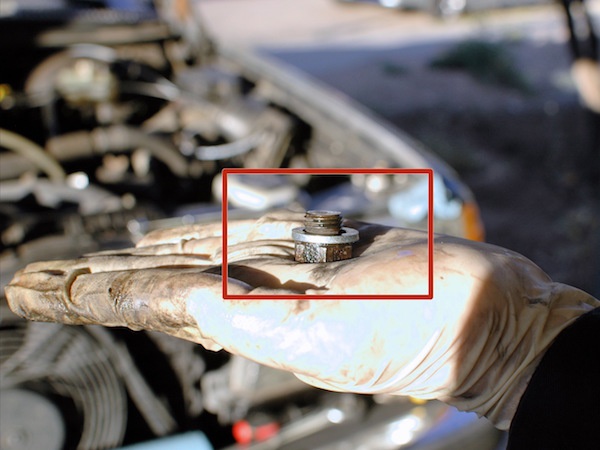
One thing to keep in mind is how short the block drain plug is - if you go in unaware you might be surprised by how quickly it comes out, surprising you with a rush of coolant. The next picture shows how little thread length there is to work with:
Step 6
Now that the radiator and block are both drained, go ahead and put the radiator and block drain plugs back in. When installing the block drain plug, Mercedes did not specify a torque spec for this drain plug anywhere in the factory service manual so just get it nice and tight. As for the radiator drain plug, consider using a quarter or other coin to tighten it. This will prevent you from over-tightening it.
Step 7
With the drain plugs re-installed it is time to fill the cooling system. Dilute the coolant as recommended on the bottle of concentrate. Normally, you will mix the coolant 50/50 with distilled water but you might mix it with a higher concentration of coolant if you live someplace where it gets exceptionally cold. Note that the W123 cooling system takes a total of three gallons. Around 2.5 gallons will go in right away, the other half gallon will be used to top off as the system bleeds itself of air.
"The process for filling the W123 is simple - Just pour it in!"
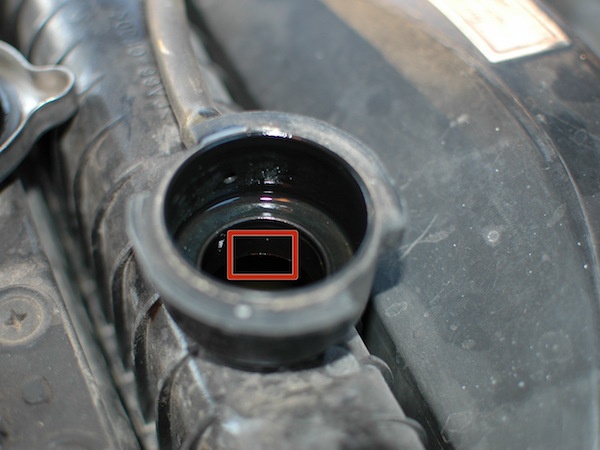
On the non-turbo diesel cars you will fill via the opening in the top of the radiator until the coolant is just visible near the top of the neck as noted in the following image:
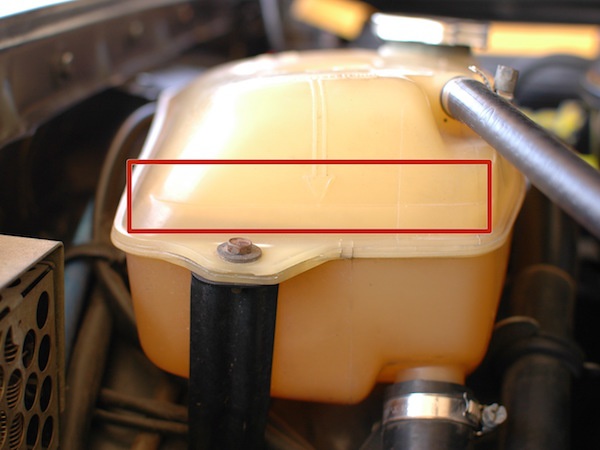
On the turbo diesel cars fill via the opening in the top of the expansion tank until it reaches the level noted on the expansion tank for cold water level, highlighted in this picture:
Step 8
The last step is to start the car and let it run, with the heater set to defrost mode, and with the radiator/expansion tank cap off until the temperature gauge reads approximately 60ª C or 140º F. Check the level of coolant at the radiator neck or in the expansion tank and top it off if it is low. Then replace the cap and you are ready to drive!
Final notes
The W123's cooling system is self-bleeding so you should not need to do anything else but drive the car, and then when the engine cools off check the coolant level again once, or maybe twice, topping off as needed. Of course, always watch your temperature gauge for any above-normal readings until you know your system is filled completely.


